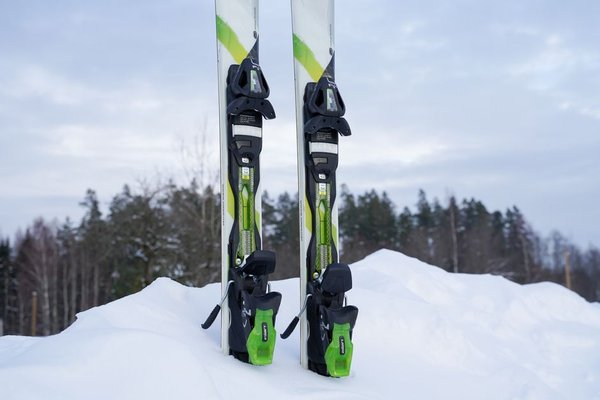
The number visible in a ski binding’s adjustment window looks precise, but it cannot tell you on its own whether your skis are set up safely. DIN is a release-setting indicator, not a universal number that suits everyone. Getting it right requires information about the skier, the boot and the binding, followed by a professional equipment check.
If you have searched for ski binding DIN settings explained, the useful question is not simply “What number should I use?” It is “How is a suitable release setting selected, and how do I know my equipment actually works as intended?”
What a DIN setting does—and does not—tell you
On many alpine ski bindings, a lower DIN indicator generally corresponds to easier release, while a higher setting generally requires greater loading. Conventional alpine designs commonly release sideways at the toe and forward at the heel. The indicated number is not a direct measurement of release force, nor a guarantee that a ski will come off in every fall.
Too low a binding release setting can contribute to unwanted ski release. Too high a setting can make it harder for a boot to release when needed. Both situations carry risks, which is why copying a friend’s DIN or increasing yours after an unexpected release is a poor substitute for diagnosis.
How a ski binding DIN chart is used
A ski binding DIN chart provides a starting recommendation based on skier characteristics and boot dimensions. ISO 11088:2023 covers the assembly, adjustment and inspection of alpine ski-binding-boot systems. A technician uses applicable procedures and manufacturer guidance to select an initial value, then checks the assembled equipment.
Weight and height
Weight and height help establish an initial skier classification. A taller and a shorter skier of equal weight do not necessarily follow the same chart path. Give the shop accurate, current measurements rather than relying on an old rental form.
Age
Standard selection procedures account for age. Common alpine charts make allowances for children aged nine or younger and adults aged 50 or older. If you have crossed an age threshold since the last adjustment, mention it when booking your check.
Skier type
Skier type describes your skiing style and approach to speed and terrain, not just how many years you have skied. Type I generally means cautious, slower skiing; Type II, a moderate approach; and Type III, faster or more aggressive skiing. Be realistic rather than choosing a more aggressive classification to sound experienced.
Boot sole length
Boot sole length is measured in millimetres and is usually moulded into the boot shell. It differs from both shoe size and Mondopoint boot size. Even two boots with the same advertised size may have different external sole lengths, potentially affecting fitting and the chart-based selection.
Why an online DIN calculator cannot finish the job
Online charts and calculators can explain how weight, height, age, skier type and boot sole length interact. They cannot check a worn boot sole, identify damage inside a binding or measure the actual release performance of your particular setup.
Real-world example: new boots, familiar skis
Suppose your old boots have a sole length of 298 mm and your replacements, in the same labelled size, measure 305 mm. The new boots click into the existing bindings. It is tempting to assume nothing else needs attention.
But the changed sole length may affect fitting and release-value selection. The new boots might also use a different sole interface, such as GripWalk, that your binding must specifically support. Clicking in does not establish compatibility or confirm correct adjustment.
Bring both skis and the boots you intend to wear to the shop. Ask for a compatibility check, the manufacturer-specified fitting adjustments and a release test. This single appointment addresses risks a chart cannot see.
What happens during a professional binding inspection?
The technician should assess the complete ski-binding-boot system: boot-sole and binding compatibility, wear or damage, and the condition of mounting and moving parts. Depending on the model, they may also check heel positioning or forward pressure, toe-interface settings and other manufacturer-specific adjustments.
After selecting the binding release setting, the shop can test relevant release movements with calibrated equipment and compare results with applicable criteria. If a measurement is outside the permitted range, further inspection or correction is needed. Ask what was tested and whether the shop recorded the results.
The DIN window should therefore be viewed as one piece of a larger assessment. It does not show whether a boot sole is compatible, a heel is positioned correctly or a release test has passed.
When should your ski bindings be checked?
A pre-season appointment is sensible, especially after storage. REI recommends having bindings checked at the start of each ski season or every 20 ski days. Arrange an additional assessment when replacing boots or changing equipment combinations, after suspected damage, or if your skiing information changes.
Unexpected release, unusual resistance when stepping in, visible wear or a hard impact all justify attention. Do not simply turn up the DIN to stop a ski coming off. Technique, snow conditions, boot condition and incorrect fitting can also cause problems.
Before skiing, remove packed snow from boot soles and look for obvious damage or abnormal engagement. Such observations help you notice issues early, but they are not a home release test.
Other binding safety mistakes to avoid
Do not assume that higher-numbered bindings are automatically safer. Each binding has an adjustment range, and the right model should suit the skier rather than being chosen for the largest number printed on the housing. Similarly, a used binding may need more scrutiny than a visual glance can provide.
Touring bindings also deserve equipment-specific advice: their mechanisms and operating modes may differ from conventional alpine bindings. Applying an ordinary alpine chart or adjustment tutorial to every touring setup can be misleading.
Useful related topics to explore are choosing ski boots for fit, understanding ski boot and binding compatibility, and preparing ski equipment for the season. Each explains another part of the same safety picture.
Frequently asked questions
Can I set my own DIN using a chart?
A chart can help you understand the likely starting value, but a qualified technician should make and verify final adjustments using your actual equipment.
Should the DIN numbers match on both skis?
Matching displayed values may be expected for many conventional setups, but the numbers alone do not confirm equal measured release behaviour. Rely on the technician’s inspection and test.
Does higher DIN mean better protection against injury?
No. Higher settings generally make release more difficult, which can reduce unwanted releases in some cases but may also hinder release during a fall. The suitable selection is individual.
Do I need a check after buying new boots?
Yes. Sole length, sole standard and boot condition matter, even when the new and old boots have identical labelled sizes.
A safer way to think about the number
DIN is useful when it is understood as part of a complete binding setup, not a target to copy or maximise. Know your measurements, describe your skiing honestly and take the actual boots to a qualified technician. Professional compatibility checks and release testing do more for binding safety than guessing a number ever will.